Monday, February 16, 2015

Non-Stick?

I realized this fact when a houseguest cooked breakfast and left me with a huge mess in the cast-iron pan he used and refused to clean it up. I couldn't understand why when he cooked, the food stuck to the pan, and when I cooked, the food released, and then I finally realized one very important thing.

Buy at Art.com

He was not allowing the pan to heat up before he dumped in the eggs!

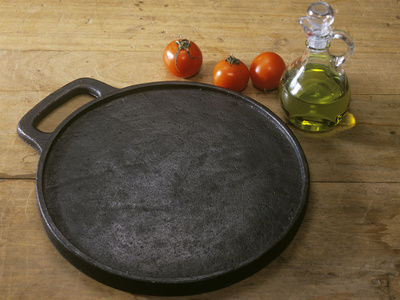
Now in case you're not aware, cast-iron cookware can get very expensive, especially when you get into the antiques (many of my pots and pans are over seventy-five years old, and one is over a hundred years old).

A light in my brain went on, because we need to understand a little of materials science to cook food in cast-iron without having it stick.

When food hits a cold (even greased) pan, the raw food touches the pan, and there is the potential for sticking. But when food hits a hot greased pan, the moisture on the surface of the food turns to steam, forming a small barrier between the food and the fat. The steam (being at 212°F, or 100°C) starts to cook the food. Then the surface of the food cooks in the fat that forms the barrier between the food and the pan, before it ever touches the pan. As we all know, the texture of food changes when it is cooked. Therefore the food that hits a hot pan doesn't stick because only the finished (cooked) surface touches the pan.

So part of the key to having your supposedly non-stick cast-iron pans work properly is simply to allow the pan to heat up hot enough to cook the food while it is still empty.

If you're constantly having to clean up messes in your cast-iron cooking pots and pans, I think you'll find that they come out a lot cleaner if you try this.

Tuesday, February 10, 2015

Herb Hack

So, in case anyone missed it, I got an Aerogarden from one of my neighbors when she moved, and I tried growing expensive lettuces in it and loved it, but the lettuces gave out after about four months. But my mother bought me another as a present, and inside was a herb kit, so I gave that a try and I love it, too. (What is an Aerogarden? This thing:

.) I've even reviewed it elsewhere, and yes, I love it.) But the problem is, the herbs grow much faster than just one person can eat them, so what should I do? One day when I was reorganizing my kitchen (which is growing to be my all-consuming task), I looked at a glass spice jar I was about to recycle, and . . .

I realized I could use the holes in the lid as support for herb stems! So I filled the jar with water, clipped the herbs, stuck the stems in the holes, and voilà! The herbs stay fresh, and some are even rooting (and with a week of nice weather and spring around the corner, time to get my patio garden going).
Buy at Art.com

So before you throw out (or better yet, recycle) your empty spice jars, consider repurposing them to root cuttings, or to keep fresh herbs fresh. If you have a chance to pick up empty shaker jars anywhere, or even the shaker lids (contact your local Italian or pizza restaurant and ask them to save the lids from broken jars for you) to put on other jars, it's just a really handy way to keep those herbs fresh for when you want them, or want to plant them to grow even more.

Tuesday, October 28, 2014

Seasoning Cast Iron


I admit it; I was negligent. I let a house guest use my cast iron pans without telling him how they are supposed to be used, and when he left, my cast iron pans were a complete mess. Most of my pans are close to a hundred years old, and I thought they deserved a little care, so like the child of any scientist, I started reading some research, when I stumbled across some information on lipid polymerization.
Now don't let the big words scare you: this is simply a matter of how fats cross-link.
Buy at Art.com
Cast Iron Skillet
Sheila Terry

No, that's not my pan. I'm too embarrassed to show you my own pans in their "before" state.

Before you read any further, please let me remind you of one thing:

Seasoning is not the same as cooking!

Please, no comments about carcinogens, etc. I know that when you cook, you don't heat oils above their smoke point, because you don't want the result in your diet. However, seasoning is a different matter entirely: you want that hard polymer on your cast iron, so that it stays hard. Don't worry, it won't come off on your food, and even better, you can actually scrub your pots and pans afterwards, even with soap and water!

This scrubber really does the job and you'll be thrilled with the results, if your pans are seasoned properly. It will tear up your hands if you don't wear heavy-duty gloves, though, so be warned. However, it will last forever!

(Note: if you have any of the old-style pull tabs (say, from a long-ago room divider), you can use them to make a facsimile of this. It won't be nearly as good, or last as long, but you will get a feel for how you will like the real thing, and cut down on your learning curve.)

The process of lipid polymerization occurs when a lipid is heated past its smoke point, so that all the stuff that keeps it runny burns off, and you are left with a solid polymer. So it makes sense that you want a polymer on the inside of your cast iron, and it will stick on and not come off, and better yet, stuff won't stick to the polymer, because it's already bonded to the iron.

To keep it simple, I used what I had at home: safflower oil, which had the lowest smoke point of any oil I had on hand. There's nothing magical about safflower oil, and what's really recommended is unrefined flaxseed oil (the type you have to keep refrigerated). I am sure the process will work for almost any oil, if a) it is a pure oil; b) you know what you are doing; and c) keep to the procedure.

And here's what you do:
  1. Clean everything thoroughly. If you have a lot of gunk on your pans, scrape it off, sand it off, burn it off, or strip it off. In my experience, you don't have to get down to bare metal, but it doesn't hurt if that is what you have.
  2. Choose an oil with a smoke point below the highest setting on your oven.  Safflower oil's smoke point is approximately 500 degrees, so I heated my oven to 525 to be safe.
  3. Oil your pans thoroughly. I mean, really thoroughly.
  4. Wipe off all the oil until your pans look completely dry. When I finished wiping them down, I had only the slightest sheen on the backs of my fingers if I ran my hand across the surface and the pan did not feel in the least oily.
  5. Now wipe off all the oil again. Seriously. You want a molecularly thin layer. Anything else will spell disaster.
  6. Put your pans upside down in a cold oven. Put a baking sheet underneath to catch any oil drips. If you have any oil drips your pans weren't wiped sufficiently dry enough.
  7. Heat the oven with the pans inside to above the smoke point of your chosen oil. Open your windows to let the smoke and smell out.
  8. Leave the pans in the oven, above the smoke point, for at least one hour (I did one hour and ten minutes).
  9. Turn off the oven, and let it and the pans cool for a minimum of two hours.
  10. Repeat a minimum of five more times.
Okay, this sounds like a lot of work. And it is. It sounds exacting. And it is. If you put on too thick a layer of oil, the pans will be sticky for a long, long time (I made this mistake once). If you don't have the pan clean enough to start with, gunk will get in your food and you'll have to start over. And it's expensive to run the oven that much. Have you priced good-quality cast-iron pans recently?

I didn't exactly follow everything, because I wanted to test how this would work in less-than-ideal conditions. So my pans were not completely free of gunk, and in some cases I let the oil sit overnight or longer before I wiped it off. Some of my pans had a bit of rust. Again, this was on purpose, to see if someone a bit careless could still get good results.

What I wasn't careless about was wiping the pans completely dry of oil, or the time above the smoke point, or starting in a cold oven and letting them cool in the oven.

The result was fantastic. A few of my pans got the hard polymerization I really wanted, but all of them had excellent nonstick surfaces (more on that in my next post).

If you haven't done this to your cast-iron pans, don't wait. Get it done.


Friday, April 11, 2014

Pasta, Part I

I was reducing a sauce for pasta the other day, and I remembered reading about cooking pasta directly in the sauce. I thought that this was completely logical, so I decided to dump the uncooked pasta in the sauce and see what would happen (after all, I had excess water in the sauce, and I had pasta that needed water, so this seemed to be the perfect solution).
Buy at Art.com
Siena, Tuscany, Italy
Keith Levit
The result of my experiment: delicious!

Here are my observations, for what they are worth:
I had to add water to the sauce--a scant cup.
The pasta took as long to cook as it would to boil water and cook the pasta.
I used tomato sauce
The sauce was smoother and better.
When I tested the pasta I kept thinking it was going to be ruined, but then it suddenly became perfectly al dente.

For the record, I was using 100% whole grain penne pasta.

So the next time you cook a marinara or other tomato-based sauce, if your pasta will fit in the pot, dump it right in. In my case, I had to up the pasta cooking time from eight minutes to fourteen minutes. You'll save washing an extra pot and colander, too!


Saturday, January 18, 2014

Clean Equipment Matters

I recently cleaned up after a long-term houseguest, only to discover that my range and stove (and pans) were a mess. I grew up in a scientific family, and my father was a chemist, and one of the early jobs I had as a child was cleaning glassware.

Now, we all know about chemical reactions, and anything less than squeaky-clean equipment will react with food, creating off flavors. So, when faced with a big, greasy mess (which, let's face it, happens to all of us) what do we do? And how do we keep it from happening too often?

First of all, you should clean your equipment regularly. This means not just your range top, but disassembling the range to clean burner pans, elements, and underneath the range top (on most ranges, you can lift up the top, and there will be a latch to hold the top elevated while you clean). This also means cleaning your oven. On self-cleaning ovens, you should run the self-cleaning cycle at least once a month (more if you have a tendency to be messy). I clean my range top, underneath the top, and burner pans weekly.

If you clean regularly, you will need little more than mild soap (I use Dr. Bronner, which is safe enough to brush your teeth with) and water. Some people prefer other cleaners. But what to do if your broiler or burner pan is a mess, with burned-on grease?

I discovered the answer to this last Monday, my regular cleaning day. I had run out of every other cleaner (my houseguest was pretty messy) and I hadn't made it to the store yet. So, in desperation, I pulled out a bottle of Pine-Sol original. And to my astonishment, a little full-strength Pine-Sol on a paper towel cleaned off my broiler pan so easily I could hardly believe my eyes.


Obviously, unless you are accustomed to drinking gallons of retsina, you will want to rinse everything extremely thoroughly to avoid any unpleasant reactions with food later (and it's probably not really safe to consume, anyway). But the Pine-Sol worked even on those parts of the oven that receive a few spills but are not cleaned with the self-cleaning feature. It also cleaned burner pans I thought were beyond repair, and burned-on food underneath the range top.

For weekly cleanings, a paste of baking soda (yes, that is safe to consume) and water should do the trick, or Dr Bronner will work, too. But if you've been neglecting your equipment, Pine-Sol made my greasy mess clean enough for a showroom!

Sunday, October 6, 2013

Hallowe'en Menus

I can remember the last time I went to a Hallowe'en party, hosted by Hallowe'en aficionados and self-professed foodies. I have to say that the food was completely dreadful. The dry-ice punch and the cupcakes decorated with tombstones had little imagination or impact. I'm sorry, but give me real food any day.


Buy at Art.com
Vintage Candy, Ouray, Colorado, USA
Julian McRoberts


Fortunately, there's no dearth of imaginative ways to celebrate Hallowe'en where food is concerned. But if you're going to invite people to dinner, and go beyond the typical orange and black menu, let's think about what Hallowe'en really is about: fear. And here is where your creativity and imagination come in. Cook something that scares you, and preferably, scares a lot of people. Take risks. Experiment with unfamiliar spices. Try emulsions, foams, or gels. Spin or mold sugar. Make a soufflé. You don't have to go completely Modernist Cuisine on your kitchen, but you can certainly take a few risks!

So take a deep breath, jump in, and get ready to make a mistake or two. Or five. And warn your guests they might be eating Chinese takeout at the last minute!

Soufflé

Soufflés, although they take a lot of work, are a great way to impress dinner guests. Some of it can be made up in advance and so your last-minute work can be eased a bit. Alternatively, if you don't mind an audience, you can start the soufflé while your guests are eating their appetizers.

Buy at Art.com
Quark Souffle, Served in a Cup
Herbert Lehmann

6 eggs
2T flour
2T butter
3/4 c hot milk
Flavourings (2 cups)
oven
Large soufflé dish
paper to make collar
Mixer
Double boiler
Whisks
Rubber spatulas
Bowls
Pastry Brush


  1. Decide what kind of soufflé you would like. They fall basically into sweet and savoury kinds, so it could be a cheese soufflé with spinach and bacon, or a spicy nacho soufflé, or a dessert soufflé such as chocolate or fruit. In any case, get your flavourings together.

  2. Now, make a roux with the flour and butter over the double boiler. Keep stirring the flour and butter together until it the butter melts and the flour begins to cook. The flour should be at least a golden-brown colour or darker.

  3. Separate the eggs. Reserve one egg yolk.

  4. Measure out your flavourings. Whatever you choose, it should equal two cups. If you wish to add some alcohol, anything from applejack to vodka, mix it in now with the flavourings. Some ideas might be au gratin potato; spinach, cheese and bacon; chicken chili; taco meat and cheese topped with salsa; beef bourgignon; chicken, asiago cheese and white wine. For dessert, try any fruit with a matching liqueur; peanut butter and jelly; or you can't go wrong with chocolate and a matching liqueur (rum, brandy, etc.).

  5. Beat together egg yolks and flavourings. Set everything aside. If it's a sweet soufflé, add 2T sugar to the egg yolks.

  6. Grease your soufflé dish. Add the paper collar and make sure it stands up 2"-3" above the edge of your dish.

  7. Preheat your oven to between 350 and 375 F. Savoury ingredients can take a little more heat.

  8. Beat egg whites until they form soft peaks (if you have very stiff peaks, your soufflé will still taste great, but it will be pretty durable).

  9. Heat milk. Mix with your roux and when you have a smooth sauce, mix it into your flavourings.

  10. Fold flavourings into egg whites.

  11. Pour gently into soufflé dish.

  12. Gently move soufflé dish into oven. Turn on the light if you wish to monitor it but do not open the door or make any loud noises.

  13. Let cook 20-25 minutes. The soufflé will rise above the top of the dish but don't worry, the paper collar will hold it in place.

  14. About 8 minutes before the soufflé is done, beat up the remaining egg yolk with a little water. Gently open the oven door. Brush the top of the soufflé gently with the egg wash, being careful not to press down on the surface. If it's a sweet soufflé, you can gently sprinkle sugar over the top and turn on the broiler.

  15. To test if your soufflé is done, wiggle it gently. It should be firm towards the edges, with a soft center.

  16. When your soufflé is done, remove gently from oven. Tug on the paper collar and it will slide out. Top if desired and serve.

  • Don't be afraid to turn your favourite foods into a soufflé. I've even had potato salad soufflé!
  • For more fun, get small ovenproof bowls with vertical sides and make individual soufflés.
  • Experiment with edible collars--phyllo dough, tortillas, piecrust dough.
  • Don't worry if your soufflé falls, or doesn't rise--it will still taste great!
Ready to try this but need something first? Try searching for soufflé recipes or equipment on Amazon.