Tuesday, November 29, 2011

Better Living Through Chemistry

Yes, that was the slogan I grew up with, not only because I was a child in the 1960s, but because my parents were both well-versed in chemistry. Although I didn't do particularly well in chemistry class because of the valences, I did understand a lot of what I did study.

Buy at Art.comThis past two weeks I have had several opportunities to see chemistry at work in the kitchen, both unexpected. The first was when I decided to soak my burner pans. Mine (I thought) were fairly clean, so I dumped them in the sink, added some warm water and dishwashing detergent, and let them soak overnight.

The results were impressive--so impressive that I've been letting them soak for two weeks and will probably let them soak for another. You see, while I live with chemistry every day, I never really believed in chemistry until I saw the grease dissolve even from spots that were invisible to the naked eye. But I would wake up in the morning, go into the kitchen, and see dissolved grease from those invisible spots spread out around the spot like a halo. And the other thing I learned from this experience was that baked-on grease smells terrible, and that smell gets into your food. And I know this because when I put the burner pans back on the stove, the food tasted much cleaner when I cooked it the next time.

Chemical reactions take time, but the results are real and consistent. Have faith that the right reactions will occur, and soak your burner pans overnight once a week!

  The second time I had a chance to really watch chemistry at work was when, as it turned cold, I actually went to the trouble of mulling wine. Most of the time, I admit, I'm lazy, and I just heat the wine, either on the stove top (be sure to unplug your carbon monoxide detector first; this is the voice of experience), or in the microwave. But mulling actually requires a poker (or other suitable piece of metal) to be heated red-hot and plunged into the wine or other beverage to warm it. (Again, the voice of experience: the wine or beer will foam up, so leave plenty of room at the top of your cup!) The difference was so extraordinary I could not believe it. You see, when you heat wine another way, caramelization does not take place, so you have less flavor because there's not the "browning" reaction such as there is with intense heat.

If you decide to try mulling, buy and reserve a separate poker for this. Otherwise you'll end up with ashes in your drink (not the voice of experience here. I figured this out for myself first).

Monday, July 18, 2011

Herbs, Part 3

Last week we discussed herbal sugars: this week we're going to talk about herb salts. Just like sugar, salt can be infused with flavours, too. Depending on the size of the salt crystals, this may take quite a bit longer but again, the flavour results are well worth the wait!

Buy at Art.com
Galvanised Metal Pot with Lemon Thyme Set in Gravel with Shells
Linda Burgess

Infusing salt works exactly the same way as infusing sugar, except the results may take much longer (up to a year). This is because the salt compound does not react with the plant essential oils in the same fashion that sugar reacts to them (remember that all plants contain sugar, and therefore plant oils and sugars are natural friends).  However, herb-infused salts are well worth the wait.

Again, we need to take into account the interplay between sweet and savoury, and their exchanges here. So, for an experiment, you might try making a small amount of cinnamon salt. What to do with it? How about sprinkling it over sweet potatoes, brushed with olive oil, walnut oil, hazelnut oil, or grapeseed oil and roasted in the oven? Now, what can you make with vanilla salt? Mint salt (it's not as strange as it sounds, as you've probably eaten mint jelly with lamb)? Again, the list is limited only by your imagination. Later on we'll get into baking some more, and then we'll be using some of these herb salts in cakes and other goodies.

In the meantime, try using these herbs to infuse salt (remember they will take a while to perfume the salt), and then we will see the results in a few months. You'll be amazed at the flavour layers you can achieve with a few infusions!

Monday, July 11, 2011

Herbs, Part 2

Many people are confused about how to use herbs. Today we'll start with a simple solution that was used by our grandparents and great-grandparents: herb sugars. Indeed, if you read recipes from earlier centuries, you will see that from the Middle Ages to Victorian times, cooks were passionate about infusing sugar with other flavours, some that may seem quite odd to us today!

On second thought, it might not be that odd. Most of us remember cinnamon sugar on French toast from our childhoods (or perhaps even more recently). Now it is time to expand on cinnamon sugar and start experimenting.

One old standby is vanilla sugar, which, like all infused sugars, is made easily enough. When you have used the vanilla bean pods in something like ice cream, take the pods and instead of throwing them away, submerge them in some sugar and place in an airtight container. Leave for a few months, and when you open the jar, you will have gorgeous, vanilla-scented sugar.

Victorian cooks were especially fond of lavender sugar, as well, and used it in almost everything. I have recipes for cakes, cookies, pies, ice creams, and more that use lavender sugar, and it's delicious in tea, too!

Buy at Art.com
 Oregano
However, as my readers know, I am interested mostly in applying techniques regardless of ingredients. Remember my post about swapping around sweet and savoury? What about combining them? Then we get oregano sugar, thyme sugar, rosemary sugar, fennel sugar, and many more (borage sugar or salad burnet sugar is especially delicious).

If this seems odd to you, remember that herbal tea? Did you put sugar in it? Ah, now this doesn't seem quite so eccentric, right? In any case, to make herb sugars of any variety, it works the same way. Spices should be finely ground to mix with the sugar. Herbs should be fresh. Simply submerge the fresh herbs completely in the sugar, and wait a few months, shaking the sugar each week or so. Sift or pick through the sugar with tweezers to get the pieces of herbs out, and you will have exquisitely perfumed sugar to use in baking, in tea, or anywhere you want to have a spicy or herbal sweet taste.

Looking through baking recipes, especially from earlier ages, is a great way to get a sense of how to use herbal sugars, but even if you never use them for anything but to sweeten your tea, you will have made your life that much more exciting. And as a last resort, infused sugars make wonderful and thoughtful presents!

Monday, July 4, 2011

Puddings

Buy at Art.com
Apple Pudding with Calvados Custard
Jörn Rynio
A pudding is merely a custard thickened with a little flour or cornstarch. If you look back to the post on ice creams, you'll see that we already have the formula for sweet custards: three eggs and 1½ cups of sugar to a quart of dairy. Heat (following the directions on the ice cream blog post if it gets lumpy), add your flavorings and let them infuse a while, put the flour or cornstarch in to thicken it, and then pour into a dish to bake until it sets up nicely. That's really all that is needed to make excellent pudding from scratch--much better than those mixes, and better for you, too.

By all means, use recipe books, especially for suggestions, but don't get too bogged down. Just remember the basic proportions, and you'll do fine! If you approach cooking as an adventure, you will be much more likely to venture out into unexplored territory! Do not be afraid to try small variations in proportions, or much greater variations in tastes--remember that what tastes great to one person will be icky to another, so don't be offended if someone, somewhere doesn't like your creation--someone else will absolutely love it!

Also don't be afraid to take those old children's classics and revamp them for more sophisticated tastes. Instead of plain Nilla Wafer banana pudding, how about spicing that up with gingerbread instead of Nilla Wafers? What about adding banana liqueur, or livening it up with orange or lime zest, or adding nutmeg? Or a tiny hint of chipotle? In the kitchen, anything goes--although sometimes it goes to the dog!

Monday, June 27, 2011

Custards


Buy at Art.com
Savoury Carrot Custard with Vegetable Sauce
Nicolas Coipeau

Custards are a mixture of milk and eggs, and are the magical ingredients mixture not only for delicious ice cream, but for quiches, puddings, and other fabulous dishes as well. Whether you use equal amounts of egg yolks and whites, or one more than the other, the general ratio is three eggs to thirty-two ounces of dairy, which makes a custard that will set up well.

You need to temper the eggs (which means to beat them while pouring the hot milk or milk and cream mixture into them) in order for the eggs not to scramble instead of custardizing. (If you end up with scrambled eggs anyway, as happens to the best of us, don't worry, you can rescue the dish--keep reading!) Most people will tell you that the milk/egg mixture needs to be heated until it coats the back of a wooden spoon, but I find that heating it to 78º C means your custard will be firmer and set up better. The mixture begins to coat the back of a wooden spoon at about 72º C.

And now, what to do when you end up with scrambled eggs, despite your best efforts at tempering? Not to worry--haul out your trusty blender, set it to the highest setting, dump the whole lumpy mess in, and let your blender do the work for the next twenty seconds. (Or, you can just start the whole thing in the blender to begin with.) I dare anyone to tell the difference--in fact, the lumpy scrambled eggs floating around in the milk will be pulverized to an amazingly smooth creaminess. And there you have it--your dish is rescued, and no-one need to be the wiser. (You can also clean your blender and have it put away in about a minute, by putting in water and a drop or two of dishwashing liquid, filling the blender container halfway, and blending for another thirty seconds. Rinse, dry, and put away. Voilà, your secret is safe!)

Monday, June 20, 2011

Ice Cream (we all scream for it!)

Buy at Art.com
Ice Cream Cone with Many Colored Scoops
Shaffer & Smith
This past weekend, I had to make four gallons of ice cream for a huge pool party (to which few people showed up, so I have tons left over). I learned a lot from reading and experimenting, so here are my general observations on ice cream:

The more fat, the better and creamier. Also, the more loaded with calories it will be! As I had to make a choice between fat and sanity, (this is for four quart machines), here's my take, after a number of experiments:
  • One half gallon of half and half
  • Six eggs
  • Three cups of sugar
  • Flavoring
  • Milk to fill up to the fill line
Natural flavorings win over artificial ones, time after time! The four flavours I made were vanilla (from vanilla beans), chocolate, mint chocolate chip, and coffee. For chocolate I used cocoa powder and for coffee, a pound of coffee beans (you can reuse the coffee beans for coffee later). For the mint I used a handful of mint leaves and infused them in the cream. Then I refrigerated dark mint chocolate bars overnight and chopped them in a hachoir. Another way would have been to melt them and add as the ice cream churned to create ribbons.

One other thing I did was to splurge on organic sugar. This is not the white, refined, stuff, but golden. Brown sugar would have been better in the chocolate and coffee, but the organic sugar was perfect in the vanilla and mint chocolate chip, adding just that extra layer of flavour.

Of course I would have loved to use David Lebovitz's formula, but . . . 24 egg yolks for a gallon of ice cream? I don't think I have that many soufflés in me to use up all those whites--not to mention that unless I get a hand-cranked machine, I don't think I can afford the calories!

(Next time, what I learned about custards!)

Monday, June 13, 2011

Citrus Fruit in Olive Oil

When I lived in the Mediterranean, I used to try to improve my French by reading women's magazines, and I was often intrigued by the recipes there. One technique that I have tried and loved is preserving citrus fruit in olive oil. The oils in the skin of the fruit will leach into the olive oil, both preserving the fruits and flavouring the oil, and leaving you with a delicious-tasting result!

Enough of the preliminaries--let's get on to the techniques. This is simple and easy to do, and will make a great gift for just about anyone, too!

Wash your fruit thoroughly before beginning. Slice oranges, lemons, limes or grapefruits into small pieces (I like to use very thin crosswise cuts for everything except grapefruits). If the fruit is exceptionally bitter, you may salt it and drain for an hour, but I prefer, where possible, to leave it alone. Pack fruit tightly into wiretopped jar and fill with a high-quality olive oil. Move the jar about carefully, so that any trapped air bubbles escape to the surface (you can pound it on a towel folded on the table. Make sure that the oil is at least a half-inch above the fruit and that no air bubbles remain (the air will make it spoil).

Now for the hardest part of the recipe--you have to put the jar in a dark place, and leave it alone for at least a month--six weeks or longer is preferred for the best result. When you are finished, you can take it out, use the olive oil, and eat the fruit as you go (make sure the oil level continues to stay a half-inch above the fruit in the jar). Delicioso!

Monday, June 6, 2011

"Good Cooks are Artists"

As the daughter of an industrial food chemist, and as an artist myself, I beg to differ with this statement. I really think cooking is mostly about science, and to this end, I just finished reading this book:

Now, I really like to cook, and I really like to understand why food chemistry works as it does. I find all kinds of things about the science of cooking fascinating, and so I was thrilled to see that there is an entire chapter devoted to foams in food! (No, not the fashionable froth that chefs are serving nowadays, but traditional dishes such as soufflés.) Barham also tells us the difference between sauces and gravies, and many other useful tidbits.

While I have not yet had a chance to put his experiments to test in the kitchen (at present I am reducing an infusion of chocolate mint to make mint chocolate chip ice cream later on), I am intrigued by some of his techniques. His techniques for making soufflés differ so radically from the traditional French methods that I learned, that I can't wait for cooler weather to put some of his advice to the test in my own kitchen, if only because I can't wait to tell people, "Yes, I'm an artist, but really, it has nothing whatsoever to do with my cooking."
Buy at Art.com
Okay, that's not really true. Yes, there is a certain amount of artistry in combining flavours and colours to build a great recipe, and certainly an artistry in conveying those techniques and amounts of ingredients to other people. But what I do in the kitchen has very little to do with creativity and inspiration, and more with understanding how flavours interact, even on the molecular level. (For example, did you know that oranges and black pepper have astoundingly similar molecules, and that you can actually learn to smell how different foods are similar or different at the molecular level? More on that later!)

Monday, May 23, 2011

Consistency (the other kind)

Baked goods are particularly difficult for some people to get right, and one of the baker's problems is consistency--how to achieve that perfect balance between chewiness and cakeyness. (I know there's no such word, but there ought to be.)

Buy at Art.com

It turns out that the difference between chewiness and cakeyness is all down to saturated vs. unsaturated fats and their proportion in each recipe. By varying the proportions (and carefully noting them down), it is possible to achieve the perfect consistency in your baked goods. Please remember that some saturated fats are not good for you: avoid Crisco and the like, and choose instead those saturated fats that are naturally saturated: coconut oil or butter.

If you use boxed cookie or brownie mixes, you know that you have to add oil. The reason for this is that the saturated fat component is already in the box (in the form of "milk solids" or something else). And what should you use for an oil? If you are not allergic to tree nuts, I recommend walnut oil, almond oil, hazelnut oil or another tree nut oil. These are not suitable for frying because of their low smoke points, but are perfect for baking or salad dressings. Nut oils add a subtle enhancement of flavour to your baked goods (called "flavour layering" that is all the rage with the popular chefs nowadays), and in addition, provide health benefits not available from the more popular corn, vegetable, or canola oils. I am all for variety in people's diets, and so I would recommend trying, at least in small quantities, some of these other oils for their varied nutritional benefits and flavours.

Monday, May 2, 2011

Herbs

So many people plant herb gardens, and then never use the fresh herbs they grow. Let's change that, starting today! First off, for those herbs you grow yourself, get rid of all those little bottles of herbs you've been using all these years. Those bottles are a pale imitation of what you will get from the fresh leaves. Instead, before you begin, take your scissors and a container, and go snip off a little of whatever you're growing: basil, mint, thyme, fennel, lovage, parsley, sorrel, winter savory, borage, lemon balm, or whatever you have. Now smell and taste each of those herbs and use your taste imagination: does it smell and taste spicy, sweet, savory? By going back to our techniques already discussed, how could you use these herbs?
Buy at Art.com
Parsley, Sage, Basil, Dill, Fennel, Tarragon, Rosemary, Chives, Thyme Oregano, Bay, Petunia
Lynne Brotchie
Here are some ideas if you are stuck:
  • Make hot or iced tea with herbs.
  • Make a sorbet from your herbs.
  • Use fresh herb leaves in a salad.
  • Take that hot tea you made from the herb and use it in place of stock or broth.
  • Use herbs in your poaching water.
  • Add fresh herbs to your dry rub or wet rub.
  • Make a layer of herbs on your grill, and put your grilled items on top of them.

Monday, April 18, 2011

Fond

No, I'm not talking about affection! I'm talking about those bits of food left over in the pan, and why they are so important.


One of the important steps in cooking food is caramelization. Basically, this consists of cooking the sugars in the food, and it is this which gives you the crusty brown stuff that is so flavourful--one of the primary reasons for grilling, among other things. Caramelization accounts for the searing on steak, the browning of meats and vegetables, and much more. The more caramelization you have on the surface of your food, the more flavourful it will be, and that accounts for the popularity of "blackened" food.

Buy at Art.com
Steaks Cooking on Grill
Dennis Lane
The trick is not to let all that delicious caramelization go to waste. If you have "bits" left over in the pan after cooking, that is a huge source of flavour. This is where "deglazing the pan" comes in. Use any liquid whatsoever--whatever will go with your meal--and pour a few teaspoons into the hot pan. Stir well and scrape up all those crusty bits into the liquid. Then reduce the liquid, and you will have yourself a tasty sauce or gravy to add to your dish. Your family or guests will love it!

Tuesday, April 5, 2011

What Can You Do with a Roux? Part III

Buy at Art.com
Biscuits and Gravy Breakfast
John Burcham
A roux, as I described some few weeks ago, is basically a mixture of flour and fat (either oil or butter). One of the Southern staples I grew up with was "cream" gravy, a mixture of pan drippings, flour, and milk. This gravy is the basis for most Southern families' gravies, and it's easy to make; simply measure (either formally or informally, by eye) your amount of pan drippings after cooking meat. It doesn't matter what kind of meat--people use this after cooking sausage, pork chops, chicken-fried steak, fried chicken, or just about anything (except bacon). Add flour into the pan with the hot pan drippings, and mix until completely smooth. Now add the same amount of milk that you added of flour, and whisk (or in the traditional style, beat with a fork) until completely smooth. You will also reduce it a little in the process, and you'll be left with a delicious addition to your meal!

Monday, March 28, 2011

Sweet and Savoury

One of the tricks I use in keeping my menus varied is to think of ingredients and dishes as basic building blocks. So everyone is surprised when I come up with new twists on old dishes, simply because I've changed them from sweet to savoury, or vice versa.

I suppose this started from my love affair with French food. When I was a child my parents usually took me out to dinner for my birthday, and I got to choose (within reason) the restaurant. From the time I was a child, I wanted grown-up restaurants, and often chose French restaurants, where instead of sweets, they would bring cheese for dessert. I suppose it was about then that I started to think of food as pliable in its interpretation, but did not commence experimenting until much later.

As we saw from the example of French toast, the basics were eggs, milk and bread. Take away the bread, and we are left with custards, for sweet dishes, and custards, for savoury dishes (think quiche). This is why learning the basics and patterns of cooking is so important; you can turn just about any recipe into just about anything, depending on your available ingredients, taste, and your imagination!

So this week, I encourage you to experiment. Take that noodle dish, and turn it into dessert. Take that cake recipe and turn it into a savoury quickbread. Anything is possible with a little imagination and determination. Even the great chefs go through some catastrophic failures before they finally create their signature dishes. And no matter how bad the result turns out to be, usually one of the children will like it, and the dog will almost always eat it!

Monday, March 21, 2011

What Can You Do with a Roux? Part 2

A few weeks ago we discussed what a roux is, and how to make one. One of the famous "mother sauces" (sauces upon which other sauces are built) is the Sauce velouté. (Velouté is the French term for "velvety.") This sauce is made by heating the roux, then adding room-temperature chicken, veal, or fish stock. The proportions should be two parts roux to one part stock. This may be either reduced or thinned, and salt and pepper added. As with Sauce Espagnole, there are so many variations it would take an entire cookbook just to list them all and give instructions!

When cooking with roux, it's important to remember to keep the roux hot and the liquid room temperature, and to whisk well. The key to velouté sauce and all its "daughter sauces" (of which there are many!) is the velvety texture.

If you use chicken stock, try a velouté sauce over a light chicken dish, or over vegetables, potatoes or rice accompanying chicken. If you are using fish stock for your velouté, it makes an excellent accompaniment to fish plates as well.

Monday, March 14, 2011

French Toast -- Not Just for Breakfast Anymore!

In keeping with the goal of Food, Face First, where we take the basics and learn to free ourselves from recipes, here's an idea for revamping that old classic, French toast. In France, it's known as "pain perdue" or "lost bread." So how can you redo French toast to make it more versatile?

To do that, we need to revamp our thinking. We assume French toast is for breakfast, and is sweet, because that's what we've been accustomed to thinking. But instead of sweet, what about savoury flavours?

French toast is, at its most basic, eggs, milk and bread. What you do with the French toast after that is more important. So rather than fry it up and serve it with cinnamon sugar, powdered sugar, or syrup, what would happen if you took eggs, milk and bread, and combined them with something else that goes well with those basics? For example, you could top it with cheese, as a start. What else goes with those basics? How about some peppers, or some fresh herbs from your garden? Get a little more adventurous, and add some fresh chevre. How about an Asian-style French toast? Tex-Mex? What happens when you substitute olive oil, walnut oil, hazelnut oil or avocado oil for your regular oil?

In fact, when you break it down, eggs, milk and bread are the basis constituents of soufflés. So any formulation that would work well in a soufflé will also work in French toast. (And vice-versa!). What happens if we chop the bread into small pieces and bake it rather than fry it?

Now what happens when you substitute some other starch for the bread? Potatoes come to mind, and then you have a casserole. What about pasta? And let's not forget rice and yes, tapioca! In fact, using the French toast base, you can create hundreds of wonderful dishes for your family.

Monday, March 7, 2011

What can You Do with a Roux?

Some time ago, I covered making a roux. Today we're going to look at what we can do with roux, to make sauces.

One of the most important bases in French cooking is the sauce espagnole. This sauce is the basis for many, many other sauces and is one of the five French "mother sauces," sauces that are the starting point in making other sauces. With a stock of sauce espagnole in your refrigerator, you will have the basis for numerous sauces that go with red meat.

2 parts onions
1 part celery
1 part carrot
1 part butter

This is called the mirepoix, and is the basis for a number of French dishes. Simply put all these ingredients in a heavy pan and brown well.

Add: 1 part tomato puree and mix well, cooking until well-reduced. Add 1 part flour and sprinkle over the mirepoix, stirring until it is well-incorporated. Since the flour is used only as a thickening agent, you are free to substitute any kind of flour as the gluten in wheat flour is not vital to this recipe. You should end up with a thick, limp mass.

At this point, you may wish to freeze some of this for later.  Fill a glass jar (the acidity of the tomatoes will eventually eat through plastic) about 7/8ths full and seal.

To continue with the sauce espagnole, add veal or beef stock to thin. Reduce, reduce, reduce until you are left with a thick, intense flavour. Now you can either use this as is, or keep and use as the basis for other French sauces.

Aha! Now you know why I had to stress so much technique: this one recipe has used almost every post I've made so far in my blog. That's why technique is so darned important!

Monday, February 28, 2011

Reductions

If you're reading a restaurant menu, and you run across something like "in a red wine reduction," it sounds pretty fancy, doesn't it? Fortunately, reductions are uncomplicated and easy to achieve, because it's a fancy word for something pretty simple.


Water reduces flavour. So by getting rid of the water, you intensify the flavour. How do you get rid of the water? By heating something slowly, and letting the water evaporate. (Hence things like "evaporated milk.") To make a reduction, simply put something in a pan and put it on low heat. The shallower the liquid, the faster the evaporation--so if you put a liquid in a shallow, flat pan, the water will evaporate much faster than putting it in a tall, deep pan, because more surface area = more evaporation. Makes sense, right?

What can be reduced? Just about any liquid -- all those gorgeous pan drippings, beer, wine or liquors, juices, you name it. You can even reduce the last serving of leftover soup and make it into a sauce that way. Let your imagination take you where it will!

Monday, February 21, 2011

Liquor Infusions

If you've been spending money on flavoured vodkas, rums, etc., liquor infusions are easy to do yourself and can be suited to your own taste. If you think you'd like to try something exotic, all the better--all you have to do is go for it.

Liquor infusions need only a medium-value liquor (bourbon, rum, tequila and vodka work best) and something with flavour to put in it. Some tried-and-true flavours are orange, lemon, lime, cinnamon, and vanilla; try combining two or more of these if you want to be adventurous. Farther out are exotic spices, exotic fruits, and even bacon.

Pour out the liquor into an airtight jar. Add your flavouring ingredients and store in a cool, dark place. Seal the jar and check for taste every few days until you have the right flavour. Feel free to add something else if you want more complexity. Once you've tasted the result and are satisfied, you can pour it back into the original bottle and label it, or into a decanter.

If you really want to impress your guests, and you're using a decanter with a fairly wide mouth, you can suck a lemon or lime into the decanter this way: start with a clean, dry decanter. Roll the lemon or lime gently on a hard surface like a countertop or table until the pulp is crushed inside and the skin is flexible. The lemon or lime must be able to almost squeeze into the mouth of the decanter.

Light a match and put it in the decanter, then stop up the mouth of the decanter with the lemon or lime. The match will burn the oxygen, creating a slight vacuum, at which point it should be fairly easy to push the lemon or lime the rest of the way inside. Shake the decanter to empty out the match, rinse, and add your flavoured liquor back in. To remove the lemon or lime when you have emptied the spirits, turn the decanter upside down and cut the fruit into pieces with a knife.

Monday, February 14, 2011

Proportions

I used to work at a liquor store, and on the back label of many liquor bottles there are recipes for making certain kinds of drinks. Now you may think that the most common question for a liquor store clerk is "Where is ______?" or "What kind of wine should I use for cooking _______?" Both are great questions, and your liquor store clerk should know the answers to them. But that's not the most common question I got. The most common question is "How much is a 'part'?"


You see, the liquor bottle recipes don't know if you are making a drink for a single person, or a crowd, or whether you want only a small-sized drink. So they give the proportions of drinks, and it's up to the consumer to decide what is the appropriate quantity.

So, a "part" is kind of like the x in your algebra book. First, off, when you are deciphering a recipe with "part"s, you need to see how many parts are included in the recipe. 5 parts? 10 parts? 35 parts?

Now envision the container for your final product: a double old-fashioned glass, a large beer stein, a punchbowl? Think about how much it takes to create the desired amount of your final product.

And now get out your measuring spoons or cups, and decide how many of those will fit into your container. When you get a close match between the size of your measuring equipment times the number of parts and your container size, that will tell you how much is a "part."

To make the equation work, then, you have a "part" which can be a teaspoon, a tablespoon, a cup, a pint, a gallon, or even more, or anything in between. Then you are going to use that measurement for everything that is a "part," whether you want one part, three parts, or twenty parts, or something else. It's all about how much of one ingredient in relation to how much of the other ingredient.

So if you have a recipe that calls for three parts soda to one part of rye, mentally divide your container (glass, pitcher, punchbowl) into four parts. If it's an eight-ounce glass you want to fill, you have four parts, so you'd divide that eight ounces by four, and you get two ounces (actually a little less as you'll need some room at the top). Then you take three two-ounce measures of soda, and one two-ounce measure of rye.

Buy at Art.com
Martini Lady
Lisa Ven Vertloh

Why are proportions important in food? In many recipes, proportions are all you get, as we have seen in the liquor store examples. However, in any case, knowing the general proportions of recipes helps free you from the recipe books and from dragging out the measuring tools each time you want to make something, and that makes getting to the point where you're ready to dive into your food that much closer!

Monday, February 7, 2011

Stock

Those who didn't grow up with a European immigrant grandmother (as I did), may find stock an intimidating task when reading cookbooks. However, stock is not only simple, nutritious, and cheap, but a staple in every kitchen, and is one of the easiest things you can make (even easier than sorbet or pate!).

Take your kitchen scraps. Sort meats into poultry, fish, beef, pork, or lamb (don't mix the meats together). Throw one (or no) kinds of meat into a slow cooker. Fill the slow cooker three-quarters full with water. Add vegetable ends, peels, leftovers. If desired, add a light sprinkle of fresh or dried herbs. Turn on your slow cooker and leave for eight hours (I do this after preparing dinner and leave it overnight). Strain your stock and if desired, pick out pieces of meat and add back in. Now pour into a heatproof measuring cup, or use a ladle, and pour off stock into dedicated ice cube trays. Don't use those ice cube trays for any other purpose, and it's even better if you have dedicated ice cube trays for each kind of stock you will make. Take out the bones from the debris, and throw the rest onto the compost pile. When the stock freezes, pop it out of the ice cube trays and put the cubes into freezer-safe containers. Label the containers and use within four months.

So why should you make stock, and what is it good for? First of all, you will be turning into food that which would otherwise go into the trash. Second, stock is the basis for soups, stews, gravies and sauces, so it's always useful to have around. And, of course, we will be saving money not buying broth or stock, and keeping waste out of the landfill, and if you compost, you will have gorgeous fertilizer for your garden!

Monday, January 31, 2011

Roux

A roux is simply a mixture of fat and flour, and there's nothing terribly difficult or scary about it. However, roux is used as the basis for numerous sauces and in other dishes, too, so it's well worth while learning how to make a roux.

The first time you make a roux, you will start off with a little fat in a pan where you have just cooked something. Measure the fat off into a measuring spoon or cup, depending on how much you have. Pour it back into the pan and look at how much of the pan it covers, to give you an idea for future reference. Now take some flour, and slowly add a little flour at a time, stirring as you go and making sure that the mixture is completely smooth before adding any more flour. You will eventually end up with something that looks a little like thick, grainy yogurt. If you continue to cook this, it will darken and develop more flavour. If you want a pale roux, cook it in a double boiler. For gumbo, where roux is an essential ingredient, you will want it very dark (but not burnt).

 What good is a roux? Knowing how to make a roux is one of the essential basics in most European cooking, as it is used to make sauces. Roux is also good for thickening soups and stews, and is one of the essential steps in making soufflés. By practicing to make roux, you will be able to use roux to build a wide variety of dishes, so it's worth practicing to know how to make one well.

Monday, January 24, 2011

Pates or Terrines

 The first time I tried to make a pate, I was terrified. I was sure it was going to use expensive ingredients, and I would mess it up! So I shakily took out my Fannie Farmer Cookbook, because I had bought a pork butt on sale and didn't know what to do with it. A pork butt is about 1/3 fat, which is what you'll need for a good meat pate or terrine.

The first thing to know is that a pate and a terrine are exactly the same thing--the only difference being that a terrine is in larger chunks. (Pate is simply the French word for "paste," so I remember that pates have to be ground to a fine paste.)

Now that we know what pates and terrines are (that is, stuff ground up together), we can start thinking about how to make them. There needs to be some sort of protein to bind everything together: milk, fat, meat, eggs, cooked beans or other legumes. Everything else is up to you! Grind everything together, coarsely or finely, and pack it into a greased loaf pan. Bake for at least 20 minutes at 350 degrees. For meats, bake until when you prick it with a fork, the juices run clear. Let cool, unmold, slice and serve.

You can dress up those pates and terrines to make them more attractive. Consider putting a half avocado in the middle of the loaf pan and packing the rest of the pate around it. Add whole, or chopped bite-sized, pieces of something (nuts, for example). Roll the finished pate or terrine in chopped fresh herbs or sprinkle them over the top, or wrap a meat pate or terrine in bacon before serving. Instead of a plain loaf pan, use a fancy metal mold. Serve your pate or terrine on a bed of something.

How do you determine what goes together? That's easy -- taste! Use the ingredients you already know from another dish. (After all, a lot of Tex-Mex food is the same ingredients, just different presentations!) Or take a look at your refrigerator and pantry and think about what each item tastes like, and what would the other items taste like with it? You may find some real winners!

Saturday, January 22, 2011

Why Face First?

My friends know that I love to eat and I have a real enthusiasm for food and flavour. I don't mind making messes in the kitchen, as anyone who knows me will attest, and often at dinner will put my face dangerously close to my plate to savour the delicious smells . . . and so now you know where the "face-first" comes from, because food ought to be so great that you're ready to just dive in!

Thanks to Linda Buzzell who blogs about food at the Huffington Post, and Correen over at Foodloversweb for provoking me to begin blogging about food. I'll do my best to post Mondays, given the constraints of my schedule and my two other blogs.

Welcome!

I started cooking when I was ten years old. As the daughter of an industrial chemist, I was always interested in how cooking worked, and thanks to a commenter on another site, and some encouragement from the fine folks at foodloversweb.com, I decided today to start this food blog. What I will be publishing is patterns in cooking as I find them. What that means for my readers is to free them from the tyranny of recipe books, and to learn to create your own recipes.
Here's the first . . . although it's a little cold now, in a few months you'll be thanking me. This is a real crowd-pleaser at potlucks and dinner parties, and can be dressed up or down. Even better, it can be made ahead. Way ahead.

Sorbet

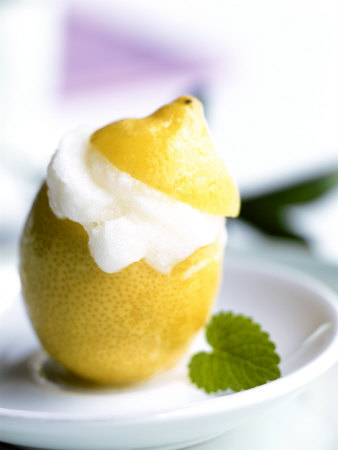
Blend anything to a smooth texture, add liquid to make a paste if necessary. Correct to please your taste, then either use the freezer method (put in a dish, put in the freezer, and stir every 10 minutes until frozen), or put in an ice cream freezer. Scoop and serve.
Buy at Art.com
"Wait!" I hear you saying. "Ingredients? Liquid? Measurements?" Don't bother. Use your imagination. Coffee, chocolate, avocado, vichyssoise. After all, frozen alcoholic drinks are a sorbet. To experiment with savory sorbets, start with your favourite cold soups. What about guacamole and other dips? Just imagine how good they will taste frozen when the weather is hot, and consider serving them at your next summer grilling party.

For imaginative serving ideas, consider making savory sorbets into a lettuce wrap, or even better for either sweet or savory dishes, rolling them in fresh chopped herb leaves (for vichyssoise, how about rolling in chopped bacon or chives, or both?).  Mold them with cookie cutters or butter or gelatin molds, slice and serve, or come up with something even more ingenious. Leave your ideas below!