I admit it; I was negligent. I let a house guest use my cast iron pans without telling him how they are supposed to be used, and when he left, my cast iron pans were a complete mess. Most of my pans are close to a hundred years old, and I thought they deserved a little care, so like the child of any scientist, I started reading some research, when I stumbled across some information on lipid polymerization.
Now don't let the big words scare you: this is simply a matter of how fats cross-link.
|
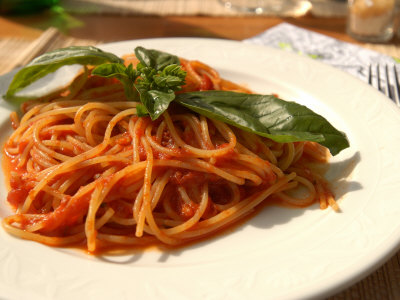
No, that's not my pan. I'm too embarrassed to show you my own pans in their "before" state.
Before you read any further, please let me remind you of one thing:
Seasoning is not the same as cooking!
Please, no comments about carcinogens, etc. I know that when you cook, you don't heat oils above their smoke point, because you don't want the result in your diet. However, seasoning is a different matter entirely: you want that hard polymer on your cast iron, so that it stays hard. Don't worry, it won't come off on your food, and even better, you can actually scrub your pots and pans afterwards, even with soap and water!

(Note: if you have any of the old-style pull tabs (say, from a long-ago room divider), you can use them to make a facsimile of this. It won't be nearly as good, or last as long, but you will get a feel for how you will like the real thing, and cut down on your learning curve.)
The process of lipid polymerization occurs when a lipid is heated past its smoke point, so that all the stuff that keeps it runny burns off, and you are left with a solid polymer. So it makes sense that you want a polymer on the inside of your cast iron, and it will stick on and not come off, and better yet, stuff won't stick to the polymer, because it's already bonded to the iron.
To keep it simple, I used what I had at home: safflower oil, which had the lowest smoke point of any oil I had on hand. There's nothing magical about safflower oil, and what's really recommended is unrefined flaxseed oil (the type you have to keep refrigerated). I am sure the process will work for almost any oil, if a) it is a pure oil; b) you know what you are doing; and c) keep to the procedure.
And here's what you do:
- Clean everything thoroughly. If you have a lot of gunk on your pans, scrape it off, sand it off, burn it off, or strip it off. In my experience, you don't have to get down to bare metal, but it doesn't hurt if that is what you have.
- Choose an oil with a smoke point below the highest setting on your oven. Safflower oil's smoke point is approximately 500 degrees, so I heated my oven to 525 to be safe.
- Oil your pans thoroughly. I mean, really thoroughly.
- Wipe off all the oil until your pans look completely dry. When I finished wiping them down, I had only the slightest sheen on the backs of my fingers if I ran my hand across the surface and the pan did not feel in the least oily.
- Now wipe off all the oil again. Seriously. You want a molecularly thin layer. Anything else will spell disaster.
- Put your pans upside down in a cold oven. Put a baking sheet underneath to catch any oil drips. If you have any oil drips your pans weren't wiped sufficiently dry enough.
- Heat the oven with the pans inside to above the smoke point of your chosen oil. Open your windows to let the smoke and smell out.
- Leave the pans in the oven, above the smoke point, for at least one hour (I did one hour and ten minutes).
- Turn off the oven, and let it and the pans cool for a minimum of two hours.
- Repeat a minimum of five more times.
Okay, this sounds like a lot of work. And it is. It sounds exacting. And it is. If you put on too thick a layer of oil, the pans will be sticky for a long, long time (I made this mistake once). If you don't have the pan clean enough to start with, gunk will get in your food and you'll have to start over. And it's expensive to run the oven that much. Have you priced good-quality cast-iron pans recently?
I didn't exactly follow everything, because I wanted to test how this would work in less-than-ideal conditions. So my pans were not completely free of gunk, and in some cases I let the oil sit overnight or longer before I wiped it off. Some of my pans had a bit of rust. Again, this was on purpose, to see if someone a bit careless could still get good results.
What I wasn't careless about was wiping the pans completely dry of oil, or the time above the smoke point, or starting in a cold oven and letting them cool in the oven.
The result was fantastic. A few of my pans got the hard polymerization I really wanted, but all of them had excellent nonstick surfaces (more on that in my next post).
If you haven't done this to your cast-iron pans, don't wait. Get it done.